Monday, November 21, 2016

Finley & Quinn--The Cozy Robe--Pattern Test

Finley & Quinn 
Blog hop & pattern review

This is yet another pattern test for Pollywoggles patterns.  I really have enjoyed making several of her patterns, some I have tested, others I have bought over the years.  Heidi really takes a different approach to her patterns, and tries to come up with something new and innovative.  I always learn something new, or try a new technique when sewing one of her patterns.


The pattern ranges in size from 12 months to 10 years old.  It is a unisex pattern that fits great for both boys and girls.  Some of the features I really love, the wide cozy collar!!!!  It lays so nice.  I also LOVE the fact that the belt is attached.  No more worrying about where the belt is tied to, arm, leg, doll, hanging from the bunk bed to climb up . . . you get the idea.  Also the pockets are great, they're on an angle so their hands can just slide in there, and keep all their treasures close at hand. 

This robe is comfy!  You can use basically any fabric you would like.  You can use Fleece, minky, flannel or other wovens.  I used a super soft cuddle fabric, similar to minky but thinner.  I found it was pretty easy to work with, and really gave a lovely drape to the robe. 


One thing I'd like to stress is that unless you're using a fabric that is going to fray DO NOT serge the seams.  The seams on minky/fleece are super soft and fluffy, once you serge them they became stiff and scrachy.  I know she says you don't need to, but I thought if I didn't I was 'cheapening out' so to speak, but after serging the side seams I realized what a difference it would make and didn't want to loose some of my cozy/comfy factor.

The pattern comes in several sizes from 12 months to 10 years, and she explains clearly how to merge sizes.  I made a 6/8 a 6 width with a 8 length.

BREAKING NEWS

 This pattern is being offered FREE, you read that right FREE for a limited time to anyone who joins her group  Pollywoggles Sewing Circle on Facebook.  Hurry because this offer is only good until the end of the year--Dec 31, 2016

If you're still on the fence, hop on over to these other lovely blogs!  They were lucky enough to be able to review this amazing pattern as well, and have shared their projects.  Too much coziness!!!!

First from our esteemed pattern designer Heidi
Pollywoggles Patterns presents Finley & Quinn

And my fellow pattern reviews from all over the globe.   

Lunatiek--Finley & Quinn blog tour
Biebiezonder-- Finley & Quinn pattern test
What's Mommy Up To?-- Finley & Quinn robe
Soul Fed on Thread-- Finley & Quinn pattern review


-------------------------------------------------------------------------------------------------
Here are some of my other favorite Pollywoggle patterns

I'll start off with my all time favorite dress pattern!!!!  
This is the Cecily Rose.  It even comes with a reversible version (didn't I mention she's clever?)


another reversible pattern, a great place for some holiday fabric 


I used some Christmas fabric on the back side, and She got to pick the fabric for the other side, of course it's pink!!! 
 Too get the Finley & Quinn Robe pattern, or any of her others, hop on over to the pattern shop!!!!  
or for a limited time get your free Finley & Quinn robe pattern at Pollywoggles Sewing Circle


Sunday, November 13, 2016

Goober Pea Boots -- Pattern Review

Goober Pea Boots


This is a pattern review for these adorable baby booties!!!!  The pattern was given to me, but the opinions are all my own.  Here is my Craftsy affiliate link if you're interested in the pattern.

----------------------------------------------------------------------------------------------
Sometimes just picking out your fabric can be the hardest part, but this time I knew exactly what I wanted to use.  I've been hording this bit of fluffy pink minky for a while, waiting for the perfect project, and I found it.  I also made a few accessories, but I'll post about them another time.


First things first just cut everything out, I went with the batting as that was the recommended choice.  It gets caught into the seams and stays put nicely.  I forgot just how messing cutting minky can be...don't breath too deeply ahhaha.

The pattern has 3 sizes; 03-6 months, 6-12 months, and 12-18 months.  Keep in mind your fabric choices will change the fit a bit.   A fluffy minky like I used, will take up a bit more room, and you'll have a slightly smaller boot then if you had used flannel or cotton as the lining, just keep that in mind.

It looks rather complicated when you read through the pattern, but after a quick read through just get started.  If you follow each step in order, it will come together nicely, don't try to overthink it. 

The instructions are short and clearly written, the pictures are really where it's at.  I'm a visual learner so I appreciated how clear all the photo instructions are.

It comes together very quickly, and before long it starts looking like a boot. This is the top part, now for the soles.  I used the non-reversible instructions since I used the non-skid slipper fabric for the soles. 


Don't these look so cozy!!!!!  Now I just get to trim the seams and turn them out!!!!  Wow that was fast.  What a fun project.  Now I want to make more of them, but I'll have to check on the sizing first!!!


If you're interested in checking out some of her other patterns, pop on over to her FB page.  Keep your eyes tuned for a new pattern, that will compliment these boots perfectly
or her Etsy page if you don't want to make them yourself. 


Click the link to go get the pattern.  Goober Pea Boots Pattern on Craftsy

Wednesday, October 26, 2016

KAIA Mini Fabric Bin--Pattern Review!!!


I was given the opportunity to review the pattern for this adorable bin.  I did not pay for the pattern, but the opinions are my own. KAIA Mini Fabric Bin

These little bins are adorable, and a great scrap buster.  The first one took about 45 mins, from printing to pressing.  I had to print it out, tape it together, and read through the directions, choose fabric, and sew it up.  The next ones went a lot faster.


These would be great for Christmas gifts, filled with some candy canes (I didn't have any on hand).

The pattern calls for tracing paper, well I didn't have any, so instead I just cut out the zig zag on the top, and laid it down on the fabric, and traced it.  It worked really well, so don't sweat it if you don't have any dressmakers carbon paper.  


I made 2 of them with a heavier interfacing, and the Pug one with a lightweight interfacing.  It folded down easier, showed fewer creases, but wasn't as sturdy.  So it depends on what you want to use it for.  Personally I prefer it a bit stiffer, it held up the pencils and anything else, and will keep it's shape.


So if you're looking for a quick project, something to stock craft sales, teacher gifts, or a beginner sewing project, go check out these adorable KAIA Mini Fabric Bins


Saturday, October 1, 2016

Polaroid Quilt!-----Giveaway too


I first saw the Polaroid quilt squares on a Facebook sewing swap.  I thought they were so cute, and knew I had to make some.  I've also been interested in paper piecing. so I combined the two in several of my squares.  I was making a birthday present for a friend who was turning 50!  I wanted to combine all kinds of things she 'loves'.  She is a baker, so I had to have the cakes and mixer, she loves tea, and leaves, and her family.  So I included paper pieced initials, and even a camping trailer.


Here's some behind the scenes photos.  I had seen lots of tutorials on how to make the quilt blocks, but hardly any on what to do after.  Even in the FB swap group no one had actually put them together ahahaha, so I was on my own.

I spent a lot of time on Pinterest and Instagram trying to decide which look I liked best.  I decided I only wanted 1 strip of fabric between the blocks, not 1 on each block.  I felt it looked cleaner and put the focus on the blocks.


Selecting your fabric is the hardest part, you need to have things the right scale, to fit your 2.5" viewing screen.  After reading a lot of tutorials and blogs, I found this awesome tutorial!!! Karla's over at Capitola Quilter had great tips, and I love the assembly line style she did, so much faster then pre-cutting and doing them all individually.  She also shows you how to do some fussy cutting.


________________________________________________________________________________

Isn't this adorable!!!!  I fell in love with this cute Puggy, over on Johanna's blog "Stuff I made"
and the shading, wow that really makes the block pop. 
Click picture for Tutorial on Shading your blocks.


The shading is really what caught my eye, even though we're a pugged house, and love all things Pug. 


 I thought it would be too much work at first, but I kept coming back to it.  I figured if I'd put this much work into the quilt so far, I might as well do it right . . . no regrets.


She makes it pretty simple, just do it all assembly line style like you did the blocks.  I used a grey charm pack, and was able to get 6 strip from each. 


Then you just sew your borders on and you are ready to assemble your rows.  I didn't really put too many pins in it, because with all the seams on the back it was hard to line it up.  So I would just use my hand and hold it back to make sure my seams lined up.


Viola!!! Quilt top is done.  Now wasn't that fun!!!!  


I then quilted it, and put another leaf fabric on the back, and tabs to hang it.  In order to quilt it, I built this table out of poster board from the dollar store and books, and boxes to hold it up.  Worked great and cost $2. 


 I hope you give a Polaroid quilt a try.  I'll make another blog post for the actual blocks I chose and I made my own paper pieced 2.5" patterns.


GIVEAWAY!!!!

Comment below if you have ever made Polaroid block!!!  If you need any motivation let me know.  And now onto the give away. To enter follow me on FB That's Sew Venice and Instagram That' Sew Venice, and then comment below and tell me a few things you're interested in. I'll do a random draw and send the winner 4 blocks to do as you choose :D

Winner will be drawn in the morning Wed Oct 5th , Good Luck!!


Sunday, September 18, 2016

Enter the Canada Cups Craftsy Bra tour GIVEAWAYS NOW!!!!!

WHOOHOOOOO!!!!! I hope you're as excited as I am!


Today is the day to enter the giveaways.  Entry starts Sunday at noon, and closes Tuesday at noon.  Winners will be announced Tuesday afternoon, there will be some consolation prizes as well if you don't win, so be sure to check back either way.

Now on to the prizes, our Sponsors have been very generous!!!!   

You can win,
  • Online classes from Braphoria, Crafsty and Closet Case Files
  • Gift certificates to Bra Makers Supply, Blackbirds Fabrics, Ann's Fabrics, and Central Sewing
  • Bra kits from Emerald Studios, Uplift Custom Bra's, and Custom Bra's. 
  • PDF pattern from Jalie
 Now even if you're convinced you will NEVER make a bra go enter, because any of these prizes would make an awesome gift, but you should totally keep it and make one, trust me it's awesome!!!! 

Have you missed any posts???  Here's a link to my Craftsy Bra Class Review and Demi Bra 
and my interview with Carrie Russell of With Love Lingerie 
The rest are all linked below, go and check up while you're waiting to see if you win!!!! 

So how do you enter?? Simple just click on my boobs!!


http://wp.me/p6SK9W-ll


__________________________________________

Giveaways

Click the image below now for a chance to win a bundle of 3 Craftsy classes (your choice):
http://shrsl.com/?dwxk


Stay with us through to the end of the tour for a chance to win additional prizes:
  • complete kits to make your own bra,
  • bra- and swimsuit-making classes,
  • fabric, and more ...

Tour Schedule Itinerary

Follow the magical tour to see what we all have under our clothes


 // Please note that none of these post links are available before the scheduled date. If you click on one too early, you will get an Error 404: Page not found. You know about those, right? //
Sunday, September 11
Monday, September 12

Tuesday, September 13

Wednesday, September 14

Thursday, September 15
Friday, September 16
Saturday, September 17
Sunday, September 18
Whoohoo! It's giveaway day today!
Monday, September 19
Have you entered the giveaways yet? Today's your last chance.
Tuesday, September 20
Giveaway winners announced on all the blogs:
After September 20
  • Come back to visit all the blogs for followup posts. It's always fun!
  • Craftsy class discounts expire at midnight Sept. 30


Saturday, September 17, 2016

Canada Cups Craftsy Tour-Saturday

What's on today???? 


Saturday, September 17


__________________________________________

Giveaways

Click the image below now for a chance to win a bundle of 3 Craftsy classes (your choice):
http://shrsl.com/?dwxk


Stay with us through to the end of the tour for a chance to win additional prizes:
  • complete kits to make your own bra,
  • bra- and swimsuit-making classes,
  • fabric, and more ...

Tour Schedule Itinerary

Follow the magical tour to see what we all have under our clothes


 // Please note that none of these post links are available before the scheduled date. If you click on one too early, you will get an Error 404: Page not found. You know about those, right? //
Sunday, September 11
Monday, September 12

Tuesday, September 13

Wednesday, September 14

Thursday, September 15
Friday, September 16
Saturday, September 17
Sunday, September 18
Whoohoo! It's giveaway day today!
Monday, September 19
Have you entered the giveaways yet? Today's your last chance.
Tuesday, September 20
Giveaway winners announced on all the blogs:
After September 20
  • Come back to visit all the blogs for followup posts. It's always fun!
  • Craftsy class discounts expire at midnight Sept. 30


Wednesday, September 14, 2016

Craftsy Class Review -- Canada Cups Cross Your Heart Relay


The day we have been waiting for has finally arrived.  I hope you have been waiting with baited breath.....I know I have been anxiously waiting to share this class and information with you.  I live in Ontario in the Greater Toronto Area, which means I am super lucky, and make other bra makers jealous...why???? Because I live less then an hour away from our very own Fair Bra Mother---Beverly Johnson.  Who is that??? Have you been living under a rock??? Have you not been following the blog hop??? Don't worry I'll fill you in. 

But first a word from our Sponser...Craftsy!   What is Craftsy?  Besides one of my favorite websites, It's a site that hosts online classes for anything craft related, from Sewing, Crocheting, Painting, Cooking, Cake Decorating, Photography.....they have a class for it.  They also carry a ton of patterns, that can all be downloaded instantly and printed out at home.  They offer several free patterns, as well as paid ones, from wonderful Indie designers. 

All the classes have professional trainers, several hours of instruction that you can pause, put into slow motion, and keep online notes on. The BEST part of the classes though are the questions.  At any time you don't understand something, or need help you simply type in a question on the side, and the instructor themselves will respond with a helpful answer and or photo.  It is extremely helpful to scroll through the questions, because more then likely someone else has already asked what you wanted to ask, and received a response so make sure to check that out and make us of it.  
As you can see on the right hand side of my screen I am a Craftsy Affiliate.  That means any link you click on from this site, they will know it's from my blog, and I will get a small reward, so to speak.  I am happy to work with them, because I respect the company and would never 'plug' something I don't believe in or use myself.  I have taken several different classes, including 3 other of Beverley's Bra and swimsuit classes, before I was offered this 3rd advanced class for free to review.   Now onto the class.


Who is this Beverly???   She is a lovely lady, who decided several years ago to put her amazing knowledge of sewing and pattern drafting into a field that was virtually untouched (not pun intended).   She started her own business "Bra Makers Supply" and has designed several patterns for bras, swimsuits, and other lingerie.  She created a niche business and has taught bra making classes all over the world.  Beverley has a brick and mortar store in Hamilton Ontario, right on the fabric strip, which makes it an exciting location for any home sewer.  I was lucky enough to go to her shop last summer and meet her in person.  If you've ever taken one of her classes, or simply watched one of the previews I have to let you know she is just as personable, funny and down to earth in person.  

Her passion for bra making, and drafting comes through in each and every class she offers.  Her teaching style is very down to earth and humorous.  She is not stuffy or pretentious at all, and makes you feel comfortable, and confident that YES you can actually make your own bra. 

Since she has literally written the book on Bra making (Bra Makers Manual) her knowledge is extensive.  I think my favorite thing about her as a teacher, is her confidence.  Not only in herself, but in you the student, she truly believes that if you follow the directions, ask the questions you need to and try hard, that you will actually make a lovely bra.  I also love that she doesn't take herself too seriously, and neither should we.  

Since this is an honest review and I've been asked to list my least favorite thing about the instructor, I think perhaps the only thing I could come up with is a difference in style or goal for my bra.  I prefer them upfront and center, where she prefers a natural breast look.  But she shows you how to change and adapt any patterns, not just her Pin Up bra's to conform to the look YOU want, not the one she might prefer. 


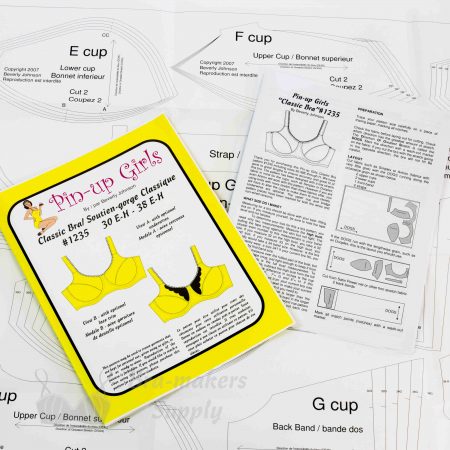
In the bra community maybe people refer to her Pin-Up Girl patterns as PUG bra's.....but well since we have a pug, honestly this is all I can see when I read that. Hahaha That is why I always refer to them as Pin-Up Girl Patterns.  


This class, and all her classes are very professional.  The Craftsy studio is where they are all filmed and very well done.  They are not touch and go like some of the YouTube videos you may have watched.  The sound quality is excellent, and very clear, the filming is flawless.  She always zooms in, and shows how to do each step slowly and clearly.  You can see everything she is doing, and she uses contrasting thread at times so the stitching really shows up to help you see what to do.  It`s definitely a first class video.  
The content of this video is NOT for beginners in sewing or bra making.  You really would want to have a bra or two under your belt.  She does not take you step by step in making an actual bra, that is what the first class is for.  In this class you build on the information in the two other classes.  She shows you not only how to sew a foam bra, but how to take any bra pattern, and convert it into a foam bra pattern. 

She also shows you how to make two new styles from her Pin-Up Girls Classic bra pattern.  The new styles are a Demi cup, and a Balconette.  Both benefit from the foam to give you additional support and lift, with less coverage yowza!!!!  She is gracious enough to help you convert other patterns that are not hers as well, just check the questions at the side.   She is very prompt in her replies, and thorough, often offering up pictures or diagrams to help explain certain aspects.  She is also willing to give help with fit, and feedback.  Just post a picture of your bra, to brag about your amazing accomplishment or, to get some help with an area that isn`t working for you.  She can look at the offending bra, and instantly tell you what is wrong, how to fix it on the bra, but more importantly how to fix it on the actual pattern, so you don`t end up with that issue again.  


As you can tell I was very happy with this class, if it had not been offered to me to review, I would have bought it anyway (sorry Craftsy).  Now I all I have to get is the new Panty class Sewing Panties: Construction & Fit and I have the whole set.  

I wholeheartedly recommend this class to anyone that has made a bra before, and really wants to learn how to use the foam, and try for a new style.  And if you haven`t made a bra yet, or taken any of her classes, go check out the reviews for her first class `basic construction and fit`.  You`ll find a discount link available there.  
 
___________________________________________________________________


And now for the best part....my new Demi cup bra!!!  I made this to go under some of my wrap style tops and dresses.  I don`t want part of the bra to be seen, but want plenty of support so I feel comfortable wearing them, and I`m not always tugging on my tops or straps.  I am very pleased with it, I had several adjustments that had to be made along the way, and have transferred them to the patters as well, so next time I won`t have to worry about them.  Here are a few pictures of the process!!! I hope you have enjoyed this, I`ve had a wonderful time sharing my experience, and reading about everyone else.  I love seeing all the fabulous new bras.  There is nothing as satisfying as making something that is not only functional, but beautiful as well.  I would like to give a big shout out to not only Beverly, but the lovely people on the Bra Making Forum, and other Sewing boards.  Your help, support and motivation has made it all possible.  As someone who has struggled for years finding affordable bras, I truly do thank you all.  

 First you make sure you get your measurements right and cut out all your pattern pieces, make sure to make any adjustments,  then cut out your fabric.  I've learned that if you put layers of tissue paper between the layers and underneath the fabric, it really cuts down on the slipping.  I use a very small rotary cutter and take my time.  You can also use tissue paper under your delicate fabric while sewing it, and just tear it away after. 


The cups take the most work, so sometimes it's nice to get the frame done first so you feel like you've accomplished something.   


 For the demi cup or foam cups you need to make a new pattern to work with.  Don't worry Beverly walks you through each step. 


Voila we have a cup!!!!!!!!
Now we sew it to the frame and add our channeling and straps!!!!

Wasn't that easy?


Yay it works, no bra or bridge showing through the neckline. 

Go try a class!!!! and then post back here how it went.  


Craftsy has generously offered my readers 50% off this Class.  Just use my affiliate link here.  


Now Go check out the bra Michelle made from the same class...it's Gorgeous!!!  Michelle's Craftsy Review
__________________________________________

Giveaways

Click the image below now for a chance to win a bundle of 3 Craftsy classes (your choice):
http://shrsl.com/?dwxk


Stay with us through to the end of the tour for a chance to win additional prizes:
  • complete kits to make your own bra,
  • bra- and swimsuit-making classes,
  • fabric, and more ...

Tour Schedule Itinerary

Follow the magical tour to see what we all have under our clothes


 // Please note that none of these post links are available before the scheduled date. If you click on one too early, you will get an Error 404: Page not found. You know about those, right? //
Sunday, September 11
Monday, September 12

Tuesday, September 13

Wednesday, September 14

Thursday, September 15
Friday, September 16
Saturday, September 17
Sunday, September 18
Whoohoo! It's giveaway day today!
Monday, September 19
Have you entered the giveaways yet? Today's your last chance.
Tuesday, September 20
Giveaway winners announced on all the blogs:
After September 20
  • Come back to visit all the blogs for followup posts. It's always fun!
  • Craftsy class discounts expire at midnight Sept. 30